Jun 25 2008
May I Suggest…
…some simple and effective storage solutions. We all know the problems that are inherent with this hobby — so much *stuff* — such a big *mess* — well, that’s how itis for me, anyway! And I am making headway in my never-ending quest for organization, one baby step at a time. I’ll share just a bit here today, and I’ll start with stamp storage.
When clear stamps are purchased, they typically come on acetate type sheets in a plastic sleeve. We really do need a better way to store them on a permanent basis. The buyers at Flourishes have found a wonderful solution — Clear Boxes that easily housetwo small (4 x 6) sets, or one large (8 x 6) set. The boxes measure 4 x 6 and are a full 1/2″ thick. The hinge opens in the middle, theylay flat when opened, giving you two sides for storage. Here’s what they look like:

As you can see, the two standing have stamp sets in them. You do have to trim the acetate that the stamp sets come on just a bit to fit in the box, but not much and that just takes a minute. I like to just lay my acetate sheet with stamps on it in the box, the acetate (pictured) side out (stamps facing in), so I can easily see on the outside all that is contained in the set. I cut a sheet of white cardstock to 4 x 6 and keep it between the sets so when the box is closed, I have a white background and can easily see each set, rather than seeing through one set to the other. Makes for a cleaner display of my sets. Here’s a pic of the box opened, with two sets in it:
This makes it very easy to take off the stamp you want and return it when you are finished. I have found I spend a LOT less time *looking* for those tiny clear stamps since I have put all my stamps into these clear boxes. Since there is a place to put them, I do put them back, rather than setting them on the table, loosing them, and then spending precious time frantically looking for them (have you been there? — LOL!!!). These boxes come in sets of 6 (enough for 12 small sets or 6 large sets) and are very reasonably priced. They can be seen here.
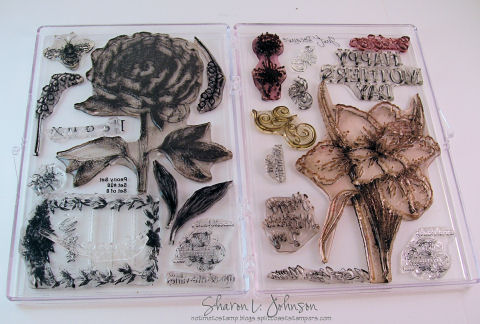
Also, I did some shopping and just got some new Spellbinder dies in the mail today, so thought I’d show them to you. These are the Tag Trios on the left and the Double Ended Tags on the right:

I love adding tags to cards — a great way to get a sentiment on your project while adding interest and fun — and I love dangling tags from a string — the Tag Trios on the left are PERFECT for that!!! Can’t wait to use them. And the Double Ended Tags on the right will look great attached with brads for a more permanent look and feel!!!
And I’ll be pefectly honest with you — I was planning to have a card or two here today to show you using these fun tags, but life just did not cooperate with me — I’m sure you know what I mean — interruptions galore coupled with a busy schedule just didn’t allow me to get cards made last night — and once I could see the writing on the wall, I figured that rather than fight to do a card, I would just settle for something less, something do-able under the circumstances. So what I did is make up a few of the tags, ready to go for the next time I can sit and make some cards. Having a few things pre-made and ready to go helps out a lot if you need to make a card quickly. I often make things ahead and I’m always so glad to just be able to grab them when needed. Here’s a few tags in the works:
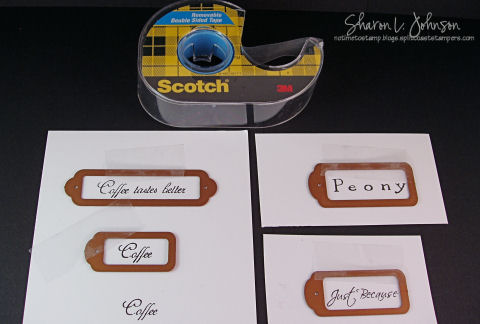
See my roll of Scotch Removable Tape? That has a permanent place right next to my Cuttlebug. I use a ton of this tape. I use it to tape my Spellbinder dies onto my paper, as shown above. If you’ve used these before, you know how they would move around if not taped. One little piece of removable tape does the trick. I also use the Scotch Removable Tape to temporarily hold my card pieces together as I am planning layouts. When I make my cards, I figure things out asI go. I may think a certain color matting will work, but in the end use another color. I have learned to NEVER permanently adhere anything together until I have the entire card made up, laid out in front of me, and I’m happy with it. And I use the Scotch Removable Tape a lot as I play around with my pieces, matting, framing, layouts, etc. And you can use one piece of tape over and over again.
Anyway, back to my tags. Here they are all run through the Cuttlebug, cut and ready to be embossed:
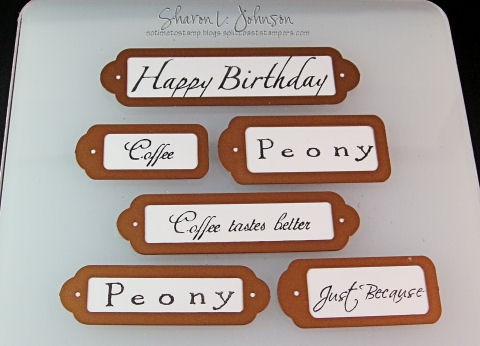
It is a bit of a time saver when you make multiple tags rather than just one. As you can see, I can now run these all through my Cuttlebug at one time to emboss them, rather than individually. Anything to save time!!! And here they are, done:
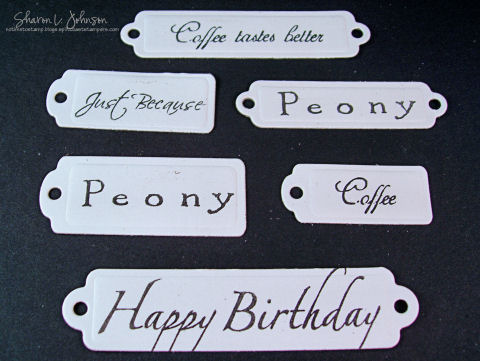
Sorry for all the flecks of dirt on this photo — I didn’t even see that IRL!!! Oh well — Also, the embossing isn’t showing up the best either, but it is there, and it is the embossing on these tags that sets them apart from tags punched with a regular punch. The embossing adds so much richness, I think! The Coffee sentiments are from Coffee with Friends, Just Because is from Siberian Iris, Peony is from Peony, Happy Birthday is from Many Sentiments.
And now it’s time to put our tag dies away — here’s a GREAT solution. My idea — NOT!!! Wish it was — LOL!!! I’ve seen this on many Blogs, the first being on Debbie Olson’s Blog, and I sure was quick to make use of this great idea!!! All of my Nestabilities are stored in CD cases, and here’s the case for my tag dies:
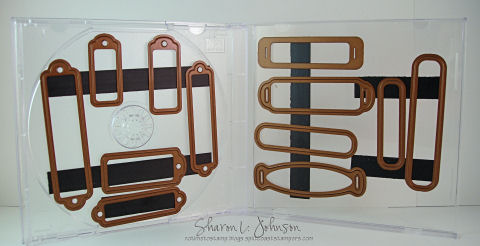
You can purchase these sticky back magnet strips in the children’s craft section of Wal-Mart — they are so easy to use. I just cut them to fit the CD case. They are cut a bit differently for these tags than for the larger Nestabilities, but all the same idea. There are four sets of tag dies in this one CD case — now how convenient is that!!! The 2 sets I showed you today are on the left, and the Ribbon Slides and Label Trios are on the right. But I would like to add, all of my Nesties would also work in the Clear Boxes shown above. I just didn’t have my Clear Boxes when I started my storage for my Nesties. Using the Clear Boxes would actually avoid the issue of the hump in the middle of the CD case!
(Editing: OK, I’ve learned from several readers that you can pull that plastic center from the CD case — DUH!!!! Thank you so much — LOL!!! Glad I learned that — LOL!!!)
(Editing again: Oh gosh, you people are so waaaayyyy ahead of me — LOL!!! I ‘m getting so many emails — you are all using these Clear Boxes for your Nesties and telling me how much better they work than the CD cases — you are all shaming me into changing them all over to Clear Boxes — LOL!!! — THANK YOU ALL SO MUCH!!!)
And once you’re here to look, just wanted to share about this Stamp Cleaner specially formulated for clear stamps:
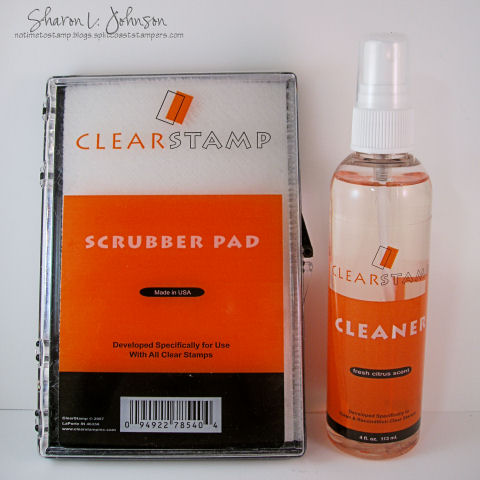
It does a wonderful job cleaning your clear stamps, makes them feel silky smooth, which is so nice, but this cleaner’s claim to fame in my book is its smell — it has the MOST declicious scent of citrus!!! It makes me WANT to clean my stamps!!!! Gotta love it!!! The pad and cleaner can be seen here.
Thanks so much for stopping in today. My next post will contain a card, I promise!!! Hope you are all having a wonderful week!!! OH, and if you like simple, you will LOVE this week’s Stamp Simply Challenge on Friday — be sure to come back and check it out — whether you plan to play or just check out everyone’s entries!!!
21 responses so far


Wow, so much information in your post! Thank you for taking the time to tell us all of this!
Ok, those plastic boxes might just be a need not a want!!! LOL! Love how you showed how the sets fit PERFECTLY inside! And, to fit two sets in one??? AWESOME FOR STORAGE!
Sharon – those clear boxes were heaven sent for me!! I love them – so much better than the CD cases! I also put my little spellbinder tags in them as well, with the magnetic strips. Like you, my scotch repositionable tape is always on my stamp table – I love that stuff!
This is a GREAT May I Suggest! Everyone always wants in the real secrets of the best in the business…and you just shared them with them.
Wow…what a post full of great tips and ideas. Thanks for the tip on the tape. Love the new boxes too….so needed!
Thanks Sharon! I HAVE been there, looking for that teeny-weeny little clear stamp in my messy stamp area! I will check out the boxes, AND the stamp cleaner, which is another issue I have when you are used to cleaning red rubber stamps—they are NOT the same!!! I love the idea of cutting/embossing multiple things at one time! Great idea!
LeAnne
Wow Sharon … thanks for all this GREAT information!!! Those clear boxes look like the PERFECT solution!!!
Just when I think I know it all….LOL……that is the time I learn something new..I will have to get some removeable tape. I try to be very carefull but…………thanks for all the information. I have the hinged boxes as well, they do work nice and don’t take up much room.
sharon it is nice to get some of your know how storge is a huge problem even with me even though i am just starting out love the post and love to learn all you know thank you michelle
Sharon,
That “hump” in the cd case can be removed. That piece may crack when you pull it out, but you don’t need it anyway! You’ll have more height within the case and more width also. Thanks for all the hints! I can always use a good hint!
Lisa
I use the magnet sheets to store my nesties. They can be cut just like the strips but hold the dies a little tighter. Some of my cases have the strips but then I discovered the sheets. They are sold at Walmart in the craft section. You can’t see through the case however with the sheets. Pull the center plastic thing out of the CD case before installing your magnets, then everything lays nice and flat inside.
Sharon,
Thanks for all the great tips. The storage cases look wonderful and the more stamps I get, the more I need them.
I haven’t used the removable tape, so that is another great idea.
All these kinds of things makes our crafting so much more enjoyable.
thanks again
Joan
Sharon, I love those plastic boxes! They are perfect for stamps but I also have my Nestabilities in them. All except for the round ones because they are too wide. I purchased the magnetic sheets at Office Max and cut them so they fit perfectly in the box and attached my Nesties! I like them much better than CD cases because I can get both the plain and scalloped in one case.
Thank you so much for the info. Good information that I will use.
Thanks so much for this information. I too am on a constant quest for organization. If my work area is cluttered so is my mind and my creativity. This has been one of the best organization tips I’ve read. Again, thanks.
Oh, I’m going to have to check out that stamp cleaner and solution!! Thanks for the recommendations!!
Sharon, I so appreciate you sharing the superb ideas you have, as well as awesome products! I love the smell of citrus!
sharon
I love these boxes. I have lots of clear stampsets and they are the perfect solution for storage. Barb
Those boxes are awesome Sharon!
Oh my heck! Girlie you are an enabler! 😉 Thank you for that! 🙂 I so have got to get myself about 100 of those little boxes! 😉 …and the Nestie dies are wonderful! TFS! Hope you are doing well! 🙂
Thank you for all of your recommendations and tips, Sharon!! You rock!!