Aug 16 2012
Telescoping Images
Holly prepared a tutorial for Splitcoaststampers earlier this week on telescoping images. What a fun technique and what a great tutorial she prepared — very easy to follow! It is followed up by a video done by Beate, so whether you prefer a photo tutorial or a video tutorial, they’ve got you covered! I wanted to try this interesting technique, so I took the easy route and (kind of) got the same appearance with some shortcuts — just my style – LOL!!!
First let’s take a look at Holly’s card:
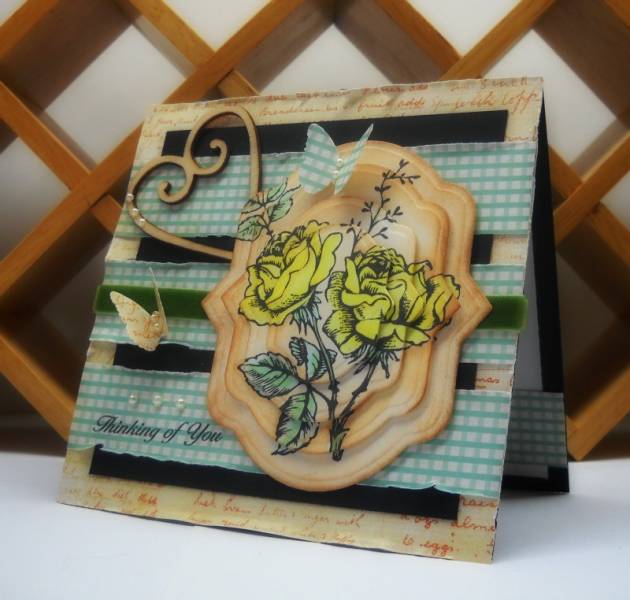
This is Holly’s card for the tutorial — isn’t it fabulous!
You can find the tutorial right here at Splitcoaststampers.
Holly used:
With Sympathy clear stamp set by JustRite
Nested Oval Medallion Labels Die by Spellbinders for JustRite
Kaisercraft pads: Nan’s Favourites and Secret Bird Society
All available at The Stamp Simply Ribbon Store, as linked.
Holly has had some medical issues of recent, making it very difficult, if not impossible, for her to stamp and type, so this project is not posted on her blog. But if you’d like to leave her some love for this great tutorial you can do so at the tutorial site or on her SCS post!
Thank you, Holly — LOVED this technique!!!
____________________
Well, yes, I DID love that technique, so I HAD to give it a try. Here’s what I made:
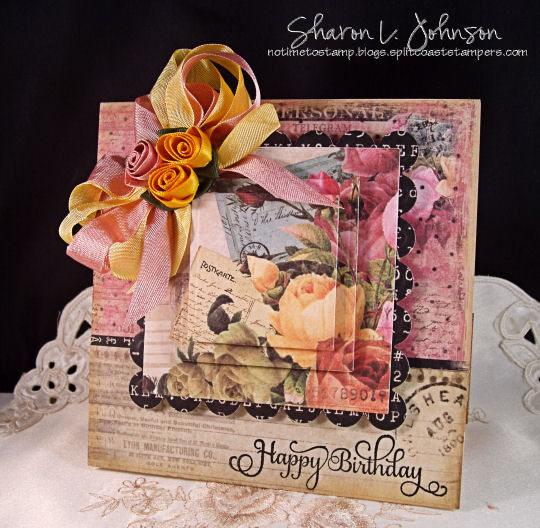
And yes, I cheated, OF COURSE! Rather than stamping and coloring a couple of the same images, I took full advantage of one on my new Prima pads — they have 3 sheets of each design, so this was a no-brainer for me — coloring — DONE!!! LOL!!!
The pad used is from Prima’s Romance Novel Collection — I used the 6×6 size.
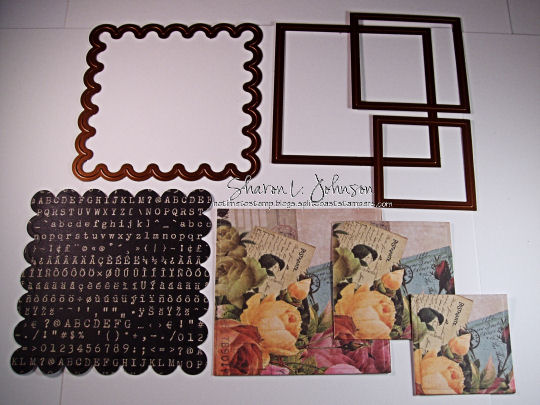
These are the dies I used (Square Nesties 4 Pack) and the pieces I cut. Holly telescoped 4 high, I opted to go for 3. I also did not cut the framed layers as shown in the tutorial. As I had 3 sheets the same, I just cut 3 full pieces to layer. I did, however, line up my patterns exactly as Holly shows in her tutorial. Sure makes it easy to get it perfect! I cut my largest square floral first. Then I took that cut piece and placed it on another sheet of the same pattern, lining it up perfectly. I placed the die used to cut that piece right over that piece and taped it in place, then I pulled out my already cut layer. This leaves my die in the right place so I can layer my next die inside for perfect alignment. If this sounds confusing, it isn’t. Just go and look at Holly’s tutorial and it’ll all make perfect sense!
Once my pieces were all cut, they were adhered using 3D Foam Squares and attached to the card front.
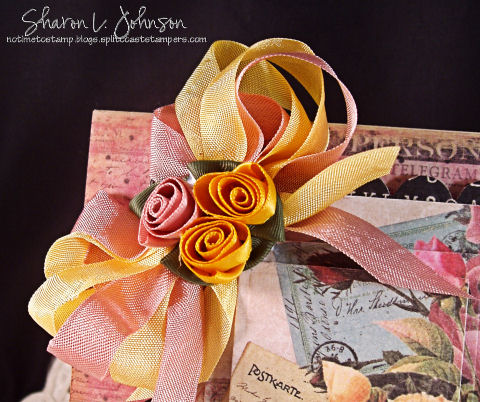
My bow is a quad bow (4 sets of loops) using Seam Binding in Rose Petal and Antique Gold.
My flowers are Satin Roses in Dusty Rose and Mustard.
The floral/bow cluster is adhered with Aleene’s Fast Grab Tacky Glue from superstores. I am generous with my glue, hold and press until it starts to set up. Once dried, it’s on forever!
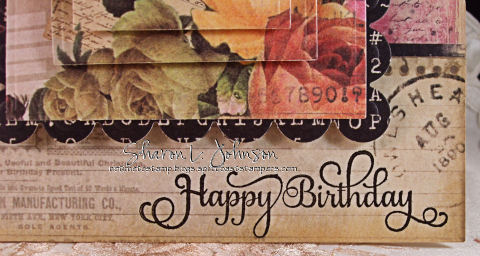
My sentiment is from a new go-to sentiment set by JustRite, a clear set called Large Fancy Sentiments.
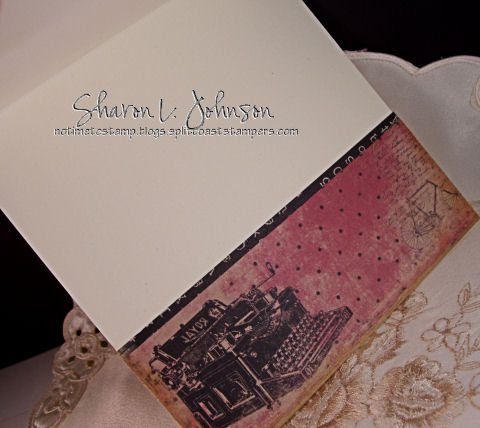
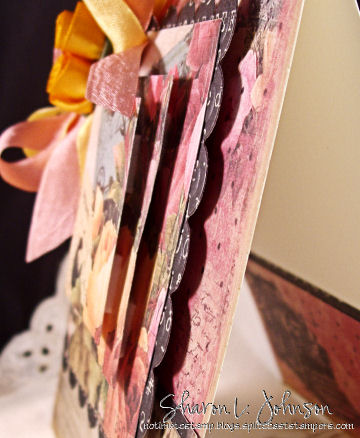
Here’s the inside — using the bottom portion of the sheet used on the front upper portion.
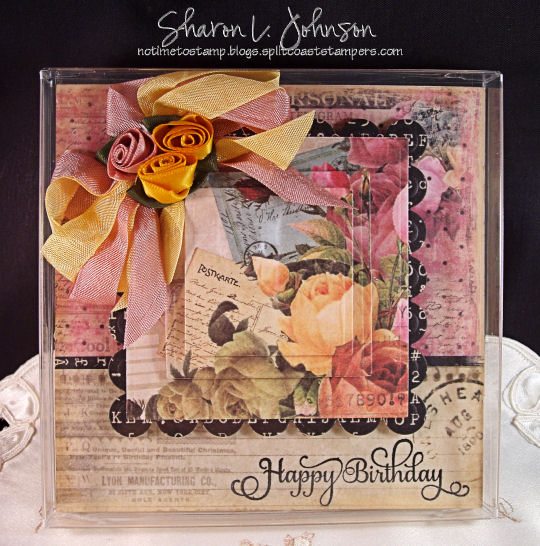
And here’s my card in its Clear Box all set to go! The card is made 5.5″ square so it fits perfectly into a 5.5″ Square Clear Box. The bow looks a little squished on top, but it’ll pop right back into shape once removed from the box. I don’t know what I’d do without my clear boxes to protect all these dimensional cards!
And that does it for this project today. Hope you try one out — they are FUN!!!
All items are available at The Stamp Simply Ribbon Store, as linked.
____________________
Store News
If you missed our beautiful new laces, check out this post.
New My Minds Eye in stock can be seen in large view on this post.
New Prima in stock can be seen in large view on this post.
New JustRite in stock can be seen in large view on this post.
Much is reduced in the Spellbinders category.
Visit our Christmas Category here.
Our HUGE paper sale continues many pads up to 50% off search the store by manufacturer or by paper size (all on the left sidebar).
All other new items listed in the store can be seen quickly here under Whats New?
Find more sale items here and here.
Thank you for shopping at The Stamp Simply Ribbon Store.
____________________
Thank you for stopping in again today it’s always such a pleasure to know you’ve been here.
MANY thanks and have a wonderful Friday ahead!
See you real soon.
5 responses so far


I love this look and your “cheating” steps make it so much quicker- thanks for sharing.
Gorgeous card, Sharon; and it’s not cheating, girl, it’s making life easier.LOL Thanks for much for sharing and giving inspiration. Guess another order is in the works with the new Prima pads.
Clever way to telescope! Beautiful card – one that I’m sure many of us will recreate using sets of 3 papers.
VERY cool effect and technique!!! Your card is gorgeous. Thanks for sharing.
[…] You can see how I created the card and find the supply list with links on this post from last summer. […]