Sep 14 2016
Shabby Chic Metallic Lustre – by Deb Saaranen
Today’s card by Deb is super special on many levels. First of all – the appearance – it is so, so lovely! It is filled with shabby vintage goodness in the form of a highly textured background created with a stencil and embossing paste, the loveliest of flowers made from coffee filters, and the rich and shabby overall color scheme/feel created with distress ink and a subtle metallic sheen. Deb taught this card at one of our Mini Make-N-Takes and the ladies LOVED it!!! (I’ll include some class photos below) Take a look:

This is the finished card, a standard 5.5 x 4.25″ that fits into one of our A2 Clear Boxes for protection, storage and a wonderful presentation.
You can find Deb’s post on her blog here.
Deb began with a heavyweight white cardstock.
After cutting her card base she primed the paper with Gesso.
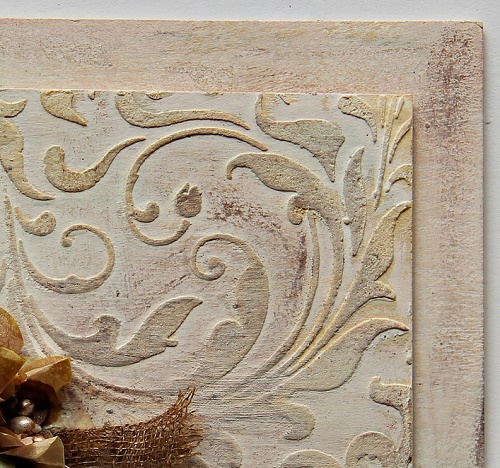
To create the embossed flourish panel Deb used a stencil (Tim Holtz Flourish) and embossing paste (Dreamweaver Regular White).
The paste is applied with a palette knife.
She then primed the embossed panel with Gesso just as she did the card base.
She then applied Tim Holtz Distress Ink in a variety of colors to the perimeter of the card base (the center doesn’t show) and onto the embossed panel, sparingly, unevenly, hit or miss, to give the vintage paint appearance. Ink was applied using the Inkssentials Blending Tool. (Make sure to use a separate pad for each color so as not to muddy up your colors.)
Any Tim Holtz Distress Ink colors can be used, but today Deb used Wild Honey, Old Paper, Bundled Sage, Antique Linen.
Once colored with the ink, Deb had the ladies go over it again with Gesso to soften up the colors. It does wonders!
As the final application Deb used DecoArt Metallic Lustre in Iced Espresso for the hint of metallic sheen. This is paste wax type of product that you simply apply with your fingertip. A little goes a long way, so test and use very sparingly, hit and miss, here and there. I do want to add that Heidi uses this product often to create her metallic “splatters”. She puts a small bit onto a surfzce, adds water, then uses a paint brush to pick it up and “splatter” it across her project. Fun!!!
Deb’s stenciled base created in this fashion is simply STUNNING!
The students in class actually made the flowers first as they required a bit of drying time.
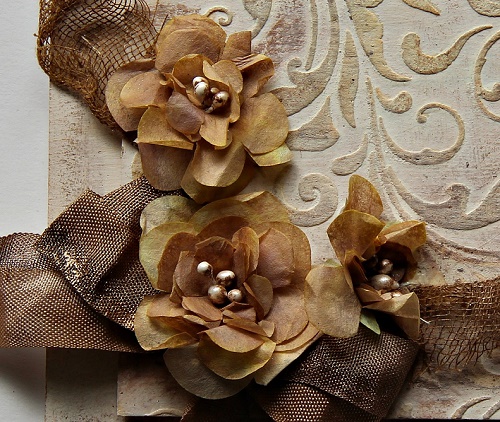
Amazingly, these are made from coffee filters. And they cut quickly.
Deb takes 3 coffee filters stacked together and folds them in half, so she actually has 6 thicknesses. She then lays her die on top and runs through. She can place several dies on the folded coffee filter stack, and remember it is 6 thicknesses, so she get a LOT of flower petals with one pass through the die cut machine.
The die Deb uses for these flowers is Spellbinders Cinch and Go Flowers.
Once the flowers are cut, they need to be pulled apart and painted. Again, Deb had the students use the same Tim Holtz Distress Ink listed above, using the more brown tones for the flowers. The flowers were just quickly painted using a wet brush and ink. Nothing fancy, just get some colors on the petals quickly, then transfer to a paper towel to dry.
Once dried, Deb had the ladies push into the center and onto each larger petal with the handle end of their paint brush to give the petals more of a cupped formation. Now it’s time to put the petals together to form flowers. Using 2 stamens, fold them in 1/2 so you have 4 heads and a stem portion. Thread the petals onto the stem, beginning with the smallest petals first, applying a dab of glue between every 2nd or 3rd layer. You can make the flowers as small or large as you like. You can manipulate the flowers to take on various shapes and forms once threaded together. You can then dip the tips of your flowers into ink or tip them with some DecoArt Metallic Lustre. You can also color your pearl stamens with the DecoArt Metallic Lustre if you like.
And note the bit of Cheesecloth and the Seam Binding bow. The cheesecloth was died with the ink and the Seam Binding was died with the DecoArt Metallic Lustre. Deb had the ladies put some of the wax paste in their fingers and just run the white seam binding through their fingers. It gave the seam binding a nice lustre, but it was rather messy. Wetting the seam binding with water helped that process, too. Some ladies chose to just use colored Seam Binding. Either way looked lovely.
Deb had the ladies make the bows using the Original Bow Easy. See how she does it here.

This is the card inside using:
Stamps: Harvest by Stamp Simply Clear Stamps from our Autumn Release
Die: Spellbinders Labels Twenty-eight
Ink: Memento Rich Cocoa

Tim Holtz Layering Stencil – Flourish
Find ALL stencil products in stock here.
Find all embossing pastes in stock here.
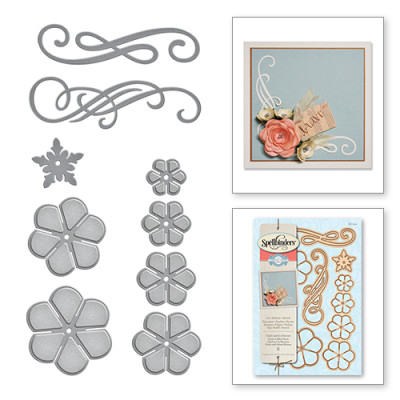
Spellbinders Cinch and Go Flowers
This is one of Spellbinders newer flower dies that has proven to be wildly popular.
Debs coffee filter flowers are a wonderful example!
All items available at The Stamp Simply Ribbon Store, as linked.
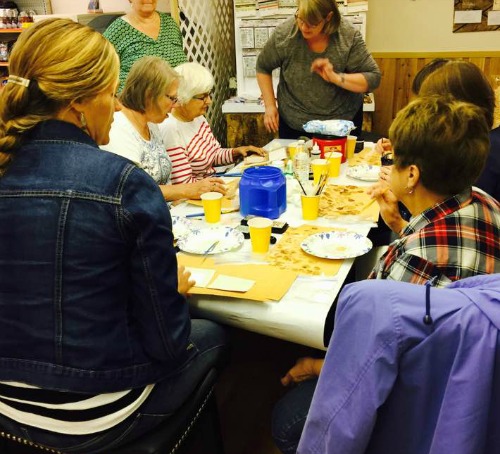
Here’s a picture of one of the groups at class. We were so busy no one was thinking to take more pictures.
The ladies on the right were painting their flower petals in this photo.
Fun day! And everyone was SO PLEASED with their cards!!!
If you are local, consider joining us.
You can keep updated as to our class schedule (we meet weekly) at our Event Page here.
___________________
What Else is New?
Our AUTUMN Stamp Simply Clear Stamp Release is here!
Scroll back to see more projects with these sets — they began on Friday, 8/19
Find ALL Stamp Simply Clear Stamps here
Find the NEW May Arts Variegated Silk Ribbon here – SUPER LOVELY!
Find all items in stock by Altenew here – including NEW sets
Luxury Pearlescent Metallic Cardstock
Delicata Inks (to coordinate with above papers)
Find all Autumn themed products here.
Find all Christmas themed products here – LOTS on sale as we await arrivals of 2016 Christmas product!
Find more NEW items listed in our store here
__________
Please Keep in Touch
Wed LOVE to have you scroll down to see all the beautiful work by our very talented Design Team.
I encourage you to LIKE The Stamp Simply Ribbon Store Facebook Page if you have not done so already.
You may also subscribe to this blog using the Feedly, Bloglovin or Feedblitz links at the top of the left sidebar.
__________
Thank you for joining us today and we hope you stop in again soon.
As always, we have much to share.
See you again soon!
_____
One response so far


What an amazing result, I keep looking at the flowers because they look so beautiful! The softness and delicacy of this card makes it so special to me. It looks like much fun was had by all. TFS.