Jul 01 2008
10 Minute Tuesday
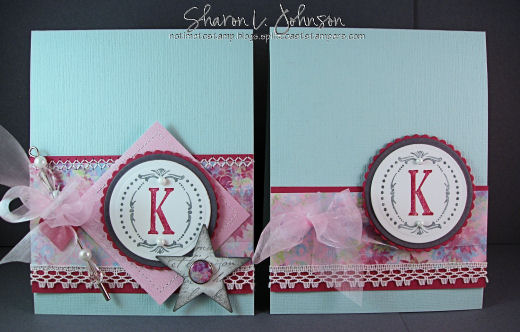
Double vision? Deja vu? Perhaps! 10 Minute Tuesday is taking a little turn today, just because I thought it would be fun! If you read my Blog postyesterday then, YES, you certainly did see the card on the left. It was a card I did for Sunday’s Featured Stamper Challenge at SCS, and you may see the entire post here. I really liked that card — the colors, the paper, the look, the vintage feel, so I decided to make a few more and turn them into a little gift set. Well, I only got one done today, but the rest will come. And can you see what I’ve done? I’ve taken the original card and pared it down to make it into a really quick and simple little cardto reproduce, but I still think it has some of the elements I love from the first card and bears a bit of vintage appeal!
Think it has the same feel as the original card? I think so. I used the same Euphoria pad by Basic Grey, the same lace, ribbon and monogram. I just left off all the other embellishments to save time, giving it a bit of a cleaner look. On yesterday’s post I showed you how I sewed on the lace. Well, for today’s card, to save time, I glued on the lace. Take a look:
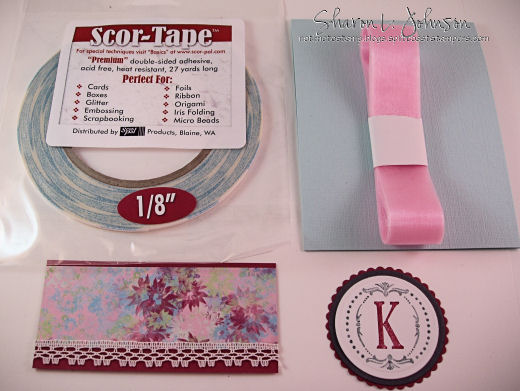
My Rose Red cardstock is cut 2″ wide. The piece of DP from the Euhporia pad is cut 1.5″ wide. I adhered the designer paper, leaving about 1/8″ of the Rose Red exposed on top. Then I ran a line of the 1/8″ Scor-Tape (sold by Scor-Pal)across the bottom of the designer paper. I could then just lay my piece of lace on top of it, and again, just like yesterday, I wrapped the lace around the back, but this time we don’t have any thread tails to deal with! Just tape the lace on the back. Done!!!
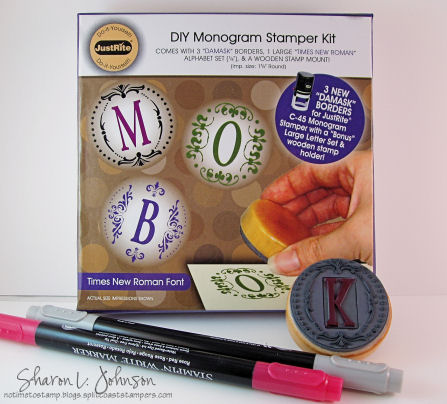
My monogram is made exactly the same as yesterday. Using the JustRite DIY Monogram Stamper with Damask Borders I inked the rubber with the Rose Red and Going Gray SU markers, stamped onto white cardstock, and cut and embossed with my Petite Circle Nestabilites. I then cut and embossed a Basic Gray mat and a Rose Red scalloped frame. Quick and fun!!!
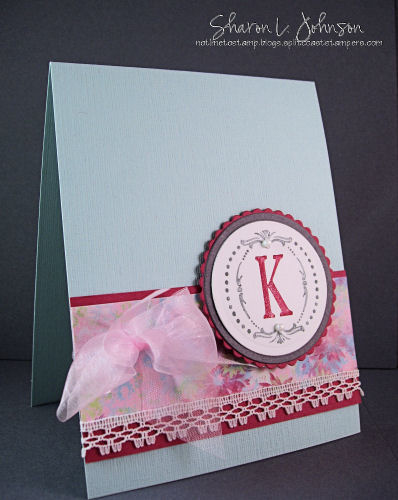
With all my pieces made, I adhered the designer paper panel to the card, wrapped with Pink Sheer Ribbon, tied a pretty bow and mounted my monogram on with mounting tape. Done!!! Ooops, almost forgot — I added these pretty Pearls to the monogram — just gives it such a nice pretty and feminine look!!!
- Stamps: JustRite DIY Monogram Stamper with Damask Borders
- Paper: SU Textured Soft Sky, Rose Red, Basic Gray. White. Euphoria DP by Basic Grey.
- Ink: SU markers in Rose Red and Going Gray.
- Accessories: Pink Sheer Ribbon, Pearls, Lace, Petite Circle Nestabilities, Mounting Tape.
Thanks so much for stopping in! Hope you enjoyed today’s version of a quick remake of a card that has a bit more detail work. I think it works!!! Tomorrow is my regular Wednesday May I Suggest…and I’ve got so many pretty new things to show you — I can’t wait!!! Have a wonderful week ahead!!!
8 responses so far


It’s still a fabulous card, but the machine stitching really put yesterdays card into a class by itself. All in all, it’s great to be able to easily produce a beautiful card minus the extras, since we’re all so pressed for time these days. Both cards are gorgeous, thanks for the great tips!
Love how you simplified that gorgeous card and kept every bit of its beauty! I have to get some lace…just started playing with my new mini sewing machine. TFS!!
Love em both!!! Have a great day Sharon.
Isn’t it amazing how just a few tweaks can make a more elaborate card – a ten minute creation? You will have me looking at all my cards now wondering how I could simpify if I needed to!!! Thanks Sharon!!
Your monogram cards are just gorgeous, Sharon!! I love them both, but the one that is “less” is my favorite!!;)
i love ten minute tues to bad i did not have ten minutes today lol love the vintage card i love that style i have to get me a monogram set they sur look fun
Wow! Perfect example of More is more AND less is more! 🙂 I love them both! It’s wonderful how you managed to keep the essential feel of the original card and yet strip it down to make a ‘quick card’!
smiles, Deena
What a fabulous 10 minute version of your previous card! Every bit as beautiful with just a little bit less going on. I’d never miss any of the extra doodads if I hadn’t seen them side by side. Thanks for sharing all your wonderful ideas, Sharon!